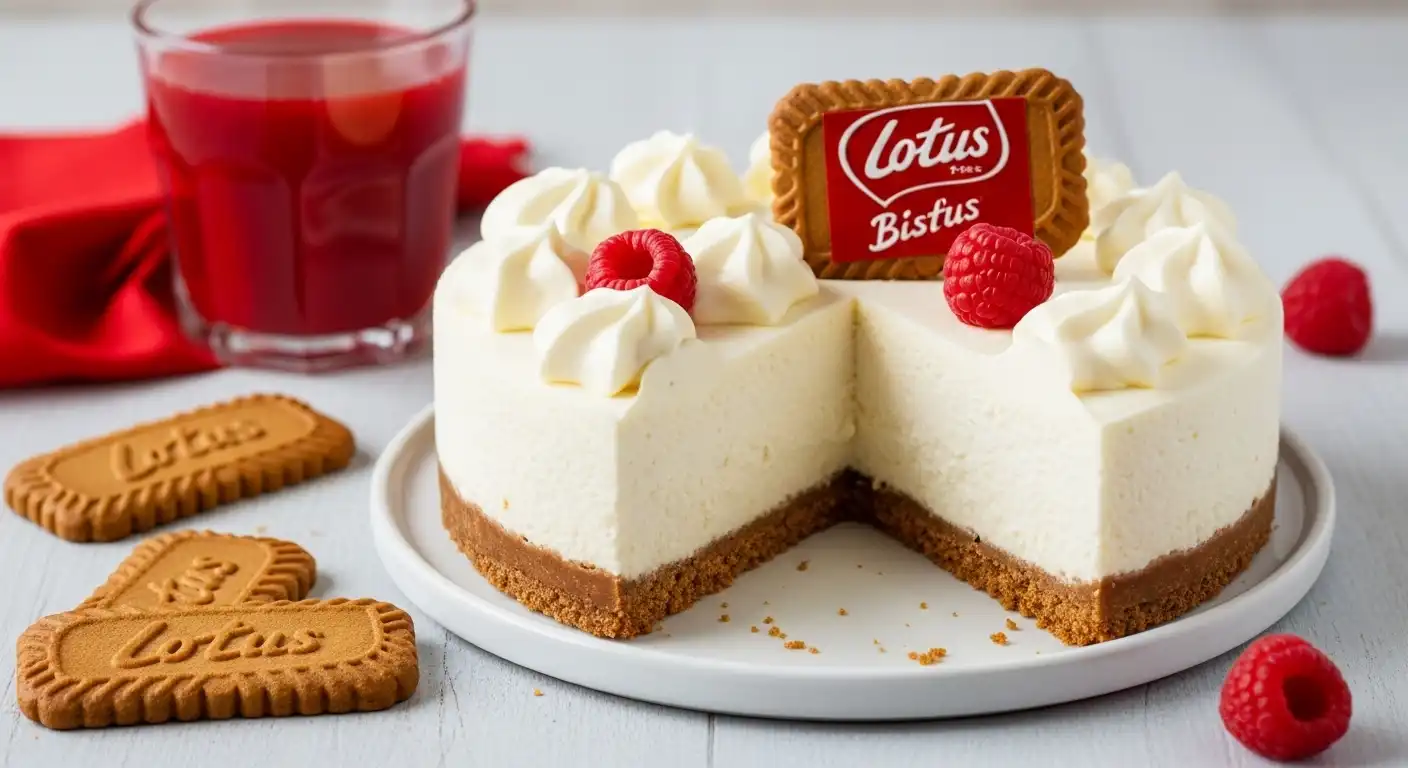
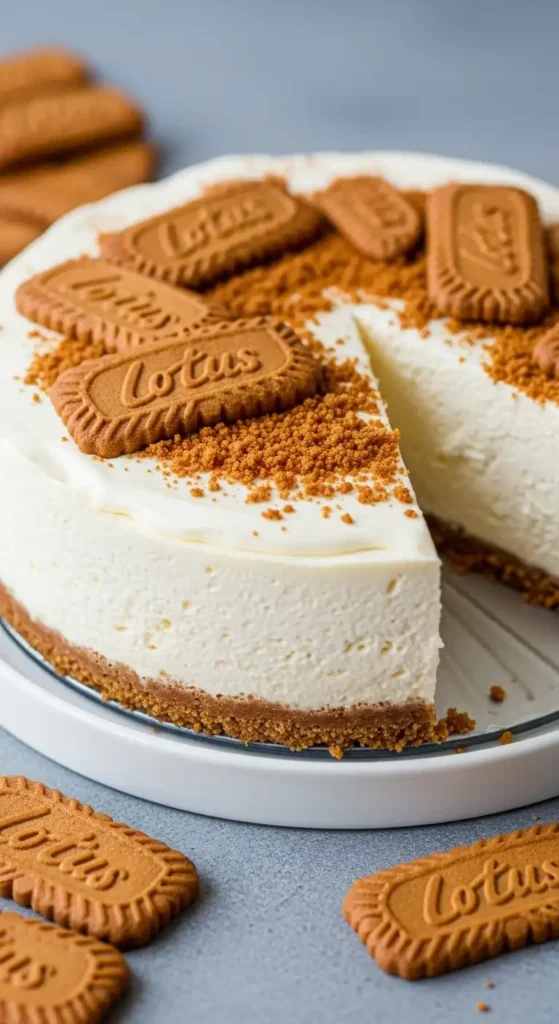
There’s something comforting about homemade desserts, and this no-bake Lotus Biscoff cheesecake is exactly that. Creamy, smooth, and simple to make, it brings a touch of sweetness to any table. With just a few easy ingredients, it sets perfectly in the fridge, giving every bite a soft and delightful texture.
Making this cheesecake is a relaxing and enjoyable process. The ingredients come together quickly, and watching it set slowly is part of the charm. Sharing it with friends or family adds even more joy, turning a simple dessert into a moment worth remembering.
What Makes This Lotus Biscoff Cheesecake So Special?
This no-bake Lotus Biscoff cheesecake is special because it brings together the rich, buttery flavor of Biscoff cookies with the smooth, creamy texture of cheesecake, much like the indulgent variety you get in Kitchen Sink Cookies. The crust is made from crushed Biscoff biscuits, giving it a sweet, slightly spiced crunch, while the filling is soft and velvety, melting in your mouth with every bite. The combination of these textures and flavors makes it stand out from regular cheesecakes and turns each slice into a little treat.
Another reason this cheesecake is so loved is that it’s no-bake, making it easy to prepare without using an oven. Despite being simple to make, it looks elegant and tastes indulgent, making it perfect for special occasions, gatherings, or even a cozy night at home. Every slice feels satisfying and comforting, leaving anyone who tries it wanting more.
Ingredients
Here’s everything you’ll need to make this cheesecake (serves ~8 slices)
| Component | Ingredient | Quantity |
| Crust | Lotus Biscoff cookies (crushed) | 200 g |
| Unsalted butter (melted) | 100 g | |
| Filling | Cream cheese (softened) | 400 g |
| Powdered sugar | 100 g | |
| Heavy cream | 200 ml | |
| Lotus Biscoff spread | 100 g | |
| Topping (optional) | Extra Lotus Biscoff spread | As needed |
| Extra Lotus Biscoff cookies (crushed) | For garnish |

Equipment Needed
- Springform or cheesecake pan
- Mixing bowls
- Electric mixer (hand or stand)
- Spatula
- Food processor or rolling pin (for crushing cookies)
How to make no-bake Lotus Biscoff cheesecake?
Before you start, gather all your ingredients and equipment. Having everything ready makes the process smooth and ensures your cheesecake comes together perfectly. Follow these steps carefully to create a creamy, indulgent dessert that sets beautifully in the fridge.
Step 1: Prepare the Crust
- Crush the cookies
Take about 200–250g of Lotus Biscoff cookies and place them in a food processor. Pulse until the cookies turn into fine crumbs. If you don’t have a food processor, place the cookies in a large zip-top bag and crush them with a rolling pin until you get fine crumbs. - Mix with butter
Melt 100g of unsalted butter in a small pan or microwave. Pour the melted butter over the cookie crumbs in a mixing bowl. Stir thoroughly until every crumb is coated, and the mixture feels like wet sand. This helps the crust hold together. - Press into the pan
Line an 8–9 inch (20–23 cm) springform pan with parchment paper for easy removal. Press the cookie-butter mixture evenly into the base of the pan using the back of a spoon or the bottom of a glass. Make sure the layer is compact and flat. - Chill the crust
Place the crust in the refrigerator for at least 15–20 minutes to firm up while you prepare the cheesecake filling. This prevents the filling from mixing with the crumbs.
Step 2: Make the Cheesecake Filling
- Beat the cream cheese
Take 400g of softened cream cheese and put it in a large mixing bowl. Add ¾ cup (90g) powdered sugar. Beat with an electric mixer on medium speed until smooth and creamy. This may take 2–3 minutes. Ensure there are no lumps for a silky texture. - Whip the cream
In a separate bowl, pour 1 cup (240ml) of heavy cream. Use clean beaters to whip it on high speed until soft peaks form — when you lift the beaters, the cream should hold its shape but still gently fall over. - Combine cream cheese and whipped cream
Gently fold the whipped cream into the cream cheese mixture. Use a spatula and fold slowly, turning the bowl as you go to keep the mixture light and airy. - Add Lotus Biscoff spread
Add ¾ cup (about 200g) of Lotus Biscoff spread to the mixture. Fold gently until the spread is evenly incorporated, creating a smooth, caramel-colored filling.
Step 3: Assemble & Chill
- Spread the filling
Take the chilled crust from the refrigerator and pour the cheesecake filling on top. Use a spatula to spread it evenly, smoothing the surface for a neat finish. - Chill to set
Cover the cheesecake with plastic wrap or foil and refrigerate for at least 4 hours. For best results, chill overnight to allow the cheesecake to firm up completely.
Step 4: Add Topping (Optional)
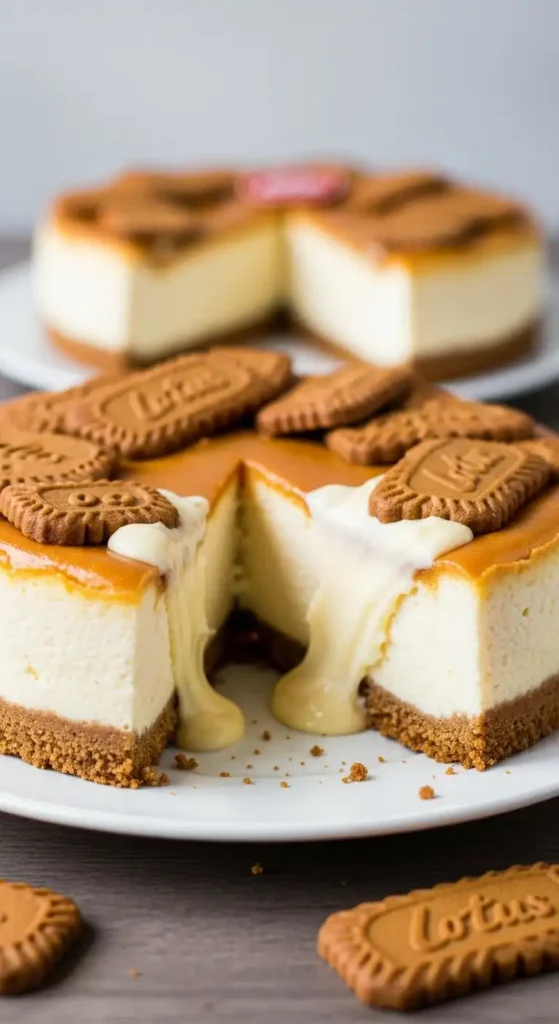
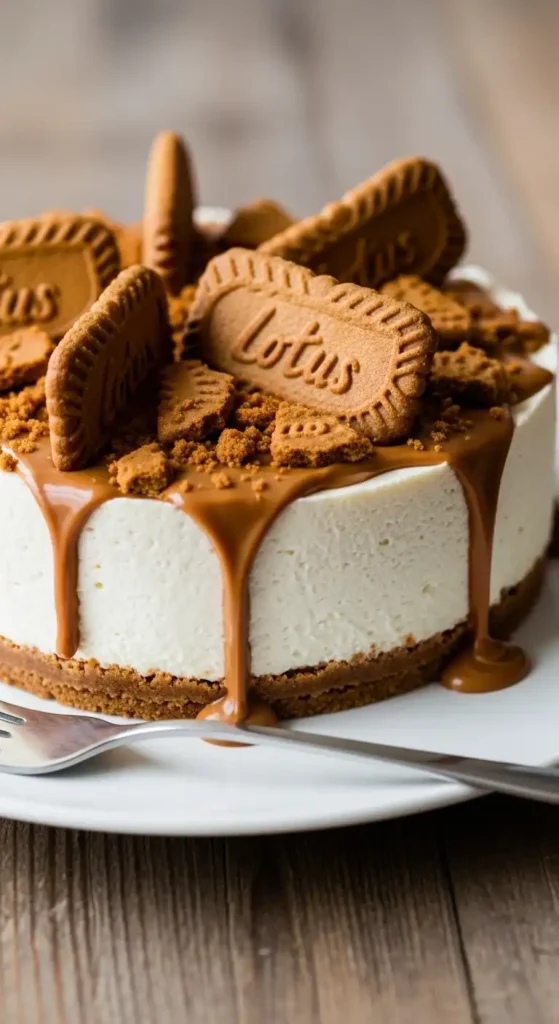
- Drizzle extra Biscoff spread
Warm a few tablespoons of Lotus Biscoff spread slightly in the microwave for a few seconds so it’s pourable. Drizzle over the top of the cheesecake in a decorative pattern. - Add cookie crumbs
Crush a few extra Lotus Biscoff cookies and sprinkle over the top for extra texture and crunch. - Serve
Use a hot knife (dip in hot water and wipe) to slice clean pieces. Serve chilled and enjoy the rich, creamy, caramel flavor of the Lotus Biscoff cheesecake.
Nutritional Info (Per Serving Estimate)
Here’s the estimated nutrition for one slice of this no‑bake cheesecake
| Nutrient | Estimate per serving |
| Calories | ~420–590 kcal |
| Fat | ~30–53 g |
| Saturated Fat | ~17–25 g |
| Carbohydrates | ~32–74 g |
| Sugar | ~24–47 g |
| Protein | ~4–6 g |
| Fiber | ~1–2 g |
| Sodium | ~100–580 mg |
Variations & Add‑Ins
- Caramel Drizzle: Add caramel sauce on top for extra sweetness, making it feel like a decadent No-Bake Valentine’s Day Cheesecake.
- Chocolate Biscoff: Add a chocolate layer between the crust and filling.
- Fruit Twist: Add fresh berries or berry compote on top for acidity and balance.
- Nutty Crunch: Sprinkle toasted nuts for texture.
Time Breakdown (Approximate)
| Stage | Time |
| Preparation | ~20 minutes |
| Assembly | ~10 minutes |
| Refrigerator Set | ~4 hours |
| Total Time | 4 hrs 20 mins |
Expert Tips for Perfect No-Bake Lotus Biscoff Cheesecake
Creating a Biscoff cheesecake is easier than it looks, but a few expert tips can make all the difference. From achieving a smooth, creamy texture to getting the perfect crust, these simple tricks will help your cheesecake taste and look bakery-worthy every time.
- Use room temperature cream cheese: It blends smoothly with other ingredients and prevents lumps.
- Chill your mixing bowl and beaters: Helps achieve a firmer, airy filling.
- Crush Biscoff cookies finely: Creates a consistent, compact crust that holds together well.
- Add butter to the crust: Melted butter binds the cookies and enhances flavor.
- Let it set properly: Chill for at least 4–6 hours, preferably overnight, for the best texture.
- Top just before serving: Decorate with Biscoff crumbs or cookies to keep them crisp.
- Optional: Warm slightly before slicing: Helps get clean slices without cracking.
Conclusion
Making a No-Bake Lotus Biscoff Cheesecake is easier than it looks. With a crunchy cookie crust, creamy filling, and the rich flavor of Lotus Biscoff, it’s a dessert that everyone will love. The best part is you don’t need an oven, and it sets beautifully in the fridge in just a few hours.
This cheesecake is perfect for any occasion, from casual family desserts to special celebrations. Once chilled and ready, you can enjoy slices that are indulgent, smooth, and full of caramel-spiced goodness. It’s simple, delicious, and guaranteed to impress.